
How can a developer guarantee that the beautiful code they wrote would work as intended? By running unit tests on that code. This is the short answer. Unit tests should be well designed, easy to read and understand and more importantly easy to maintain. Unit tests should test all possible
scenarios that the developer could think off at that time, and should be constantly updated as and when new or unforeseen scenarios are discovered
for that specific functionality. Moreover developers should ensure that the tests are well rounded, easy to read and maintain and covers all possible execution paths for the code that is being tested. This is the long answer
What is unit testing
Unit testing is the process of testing each individual unit of code, public methods, in isolation from other methods. Unit testing is the first check to ensure the code you write is working as expected.
Junit is the defacto unit test framework in the java world. The code examples are all based on Junit 4 Lets look at a simple example using Junit to test your application code
Class to be tested : Addition Helper.java – Has a method that accepts parameters to add integer values and returns the result
package com.atech.testing.unit;

/**
 * Contains methods to add values
 * @author APeter.
 */
public class AdditionHelper {

 /**
  * Add 2 numbers
  * @param a
  * @param b
  * @return
  * @throws Exception
  */
  public Integer addTwoNumbers(Integer a, Integer b) throws Exception {
    Integer result = 0;

if(a==null || b==null || a==0 || b==0) {
       throw new NullPointerException("Values should not null");
    }

    result = a + b;
    return result;
 }

}
Conventions
My recommendation is to always use the following format for each public method to be tested
-
Happy path
-
Null scenario
-
Exception scenario
Add more tests as they apply, but the above three should be the minimum for each public method to be tested.
@Before – Normally used for setting up objects, references used for the test. Method with this annotation would be executed before each and every test case. Ensure there is only method with @Before annotation as there is no limit on how many can be defined but only the last defined method takes precedence.
@After – Similar to @Before, but gets executed after each and every test
Test class code is as follows
package com.atech.testing.unit;

import org.junit.After;
import org.junit.Before;
import org.junit.Test;

import static org.junit.Assert.*;

/**
* Unit test for AdditionHelper
* @author APeter
* .
*/
public class AdditionHelperTest {
  AdditionHelper objUnderTest;

  @Before
  public void setup(){
       objUnderTest = new AdditionHelper();
  }

  @After
  public void cleanup(){
      objUnderTest = null;
  }

  @Test
  public void givenValidInputsWhenAddTwoNumberMethodIsCalledThenTheResultIsReturned() throws Exception {
     Integer result = objUnderTest.addTwoNumbers(10, 20);

      assertNotNull(result);
      assertEquals("", new Integer(30), result);
  }

  @Test
  public void givenInValidInputsWhenAddingTwoNumberMethodIsCalledThenExceptionIsThrown() {
      try{
          objUnderTest.addTwoNumbers(0, 0);
          fail("Exception should have been thrown");
      } catch (Exception e){
          assertNotNull(e.getMessage());
      }
  }

  @Test
  public void givenNullInputsWhenAddingTwoNumberMethodIsCalledThenExceptionIsThrown() {
      try{
          objUnderTest.addTwoNumbers(null,null);
          fail("Exception should have been thrown");
      } catch (Exception e){
          assertNotNull(e.getMessage());
      }
  }

  @Test
  public void givenOneInValidInputsWhenAddingTwoNumberMethodIsCalledThenExceptionIsThrown() {
      try{
          objUnderTest.addTwoNumbers(10, 0);
          fail("Exception should have been thrown");
      } catch (Exception e){
          assertNotNull(e.getMessage());
      }
   }

}
The test case method names are using the given when then method naming convention. This format does make longer method names, but they are self describing and clearly specify what the input, operation and expected output would be.
Now lets run the test and see the results
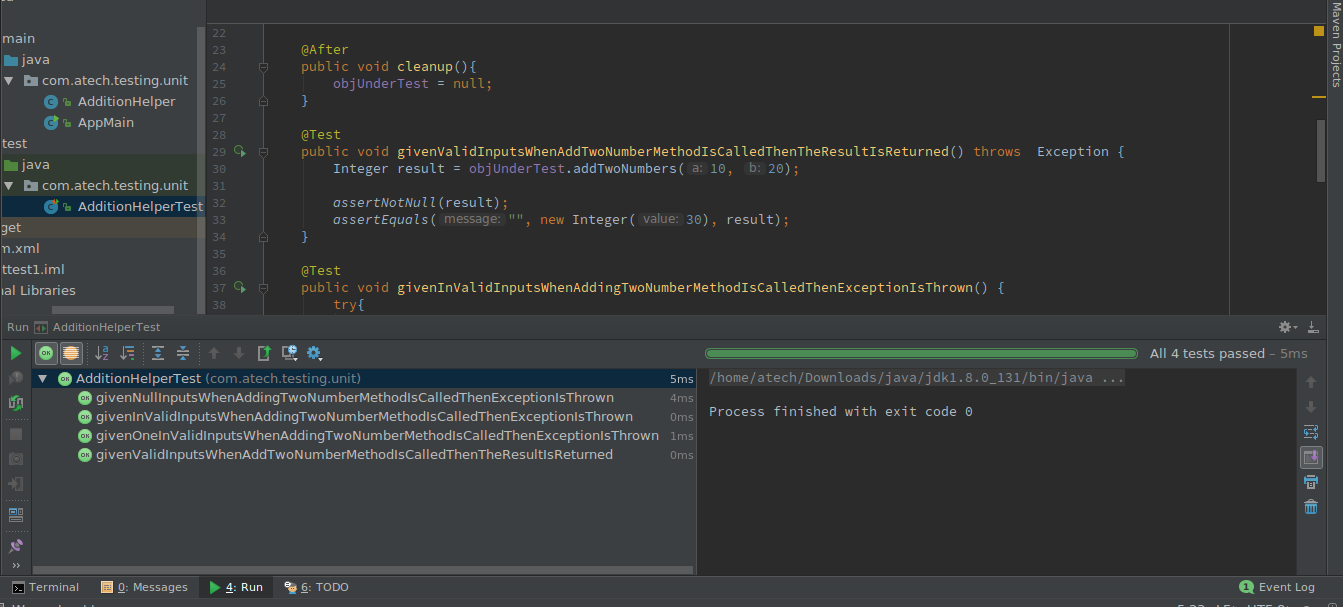
Wonderful. Simple use case with 4 different test cases.
Advertisements